Living in a small apartment means getting creative with every square inch, and let me tell you, wet laundry is nobody’s favorite space hog. The right space-saving clothes drying rack setup can transform your cramped quarters from a soggy maze of hanging shirts into an organized, efficient system. Let’s dive into exactly how to nail this.
Why Your Current Drying Setup Is Probably Failing You
You know that awkward dance you do around the drying rack planted in the middle of your living room? Yeah, that’s not normal. A proper space-saving clothes drying rack setup shouldn’t turn your home into an obstacle course every laundry day.
Most people make the mistake of buying whatever rack looks decent at Target, plopping it down wherever it fits, and calling it a day. But here’s the thing: the best space-saving clothes drying rack setups actually work with your space, not against it.
The difference between a mediocre setup and a brilliant one comes down to three things: choosing the right rack type for your specific space, positioning it strategically, and maximizing vertical space. Master these elements, and you’ll wonder how you ever lived any other way.
The Top Space-Saving Drying Rack Types That Actually Work

Not all drying racks deserve a spot in your tiny home. Some are absolute space thieves disguised as helpful laundry solutions. Let me break down the real winners.
Wall-Mounted Retractable Racks
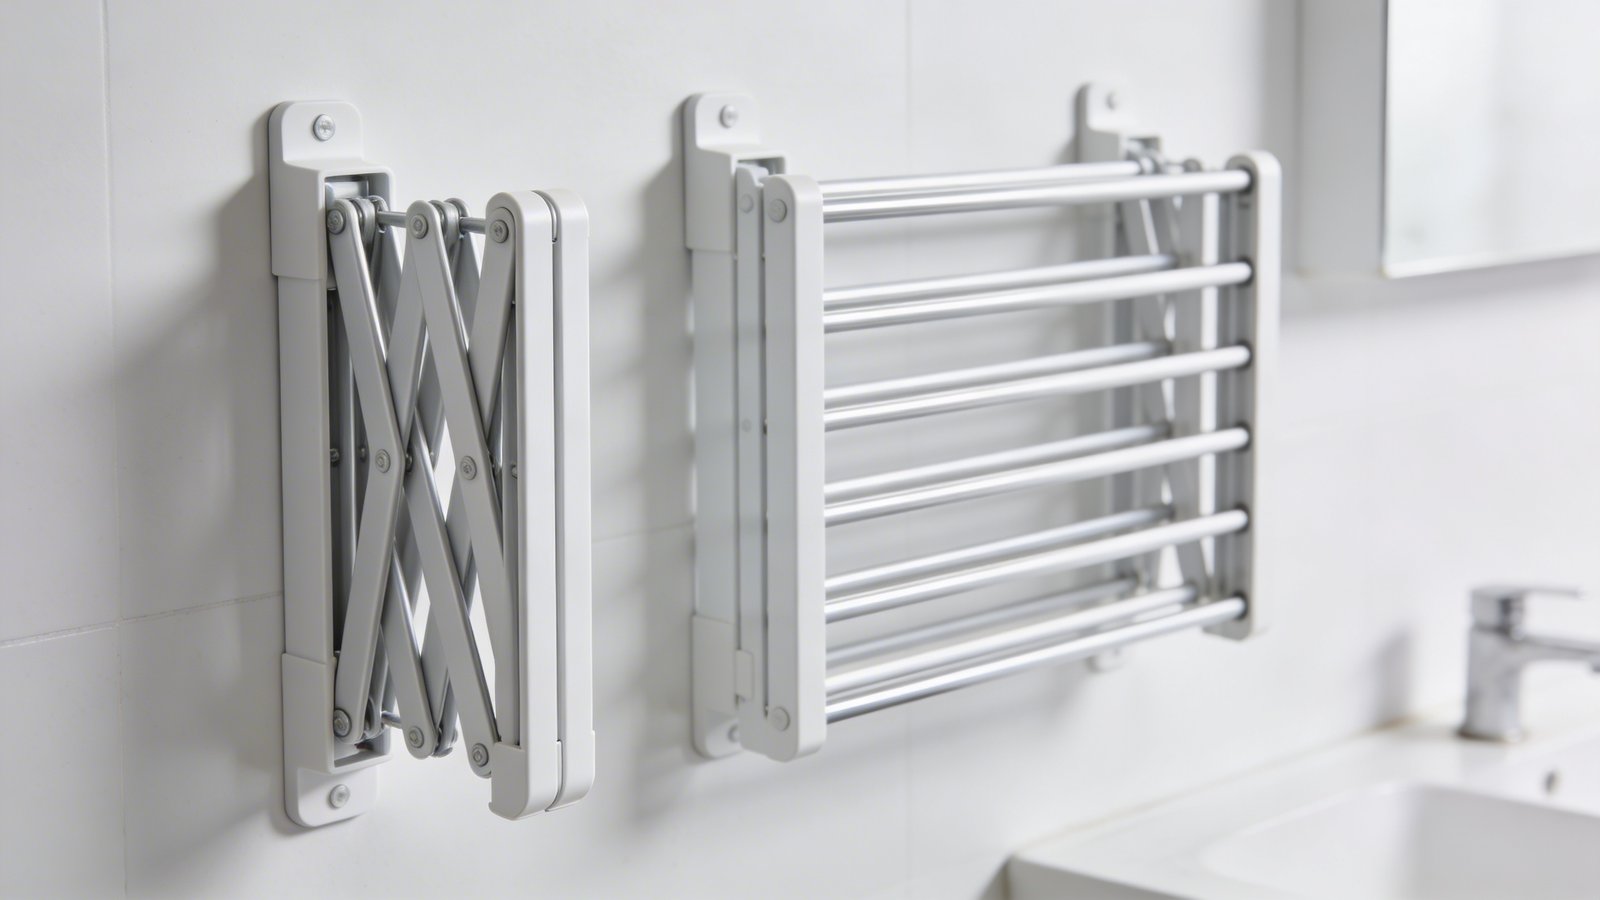
These are the ninjas of the drying rack world. Wall-mounted retractable racks fold flat against your wall when not in use, which means zero floor space occupied on non-laundry days. You pull them out when needed, load them up, and push them back when done.
The catch? You need to commit to a wall location, and installation requires actual drilling. But if you can swing it (pun intended), this option delivers the ultimate space-saving clothes drying rack setup for bathrooms, laundry rooms, or even behind doors.
Over-Door Hanging Racks
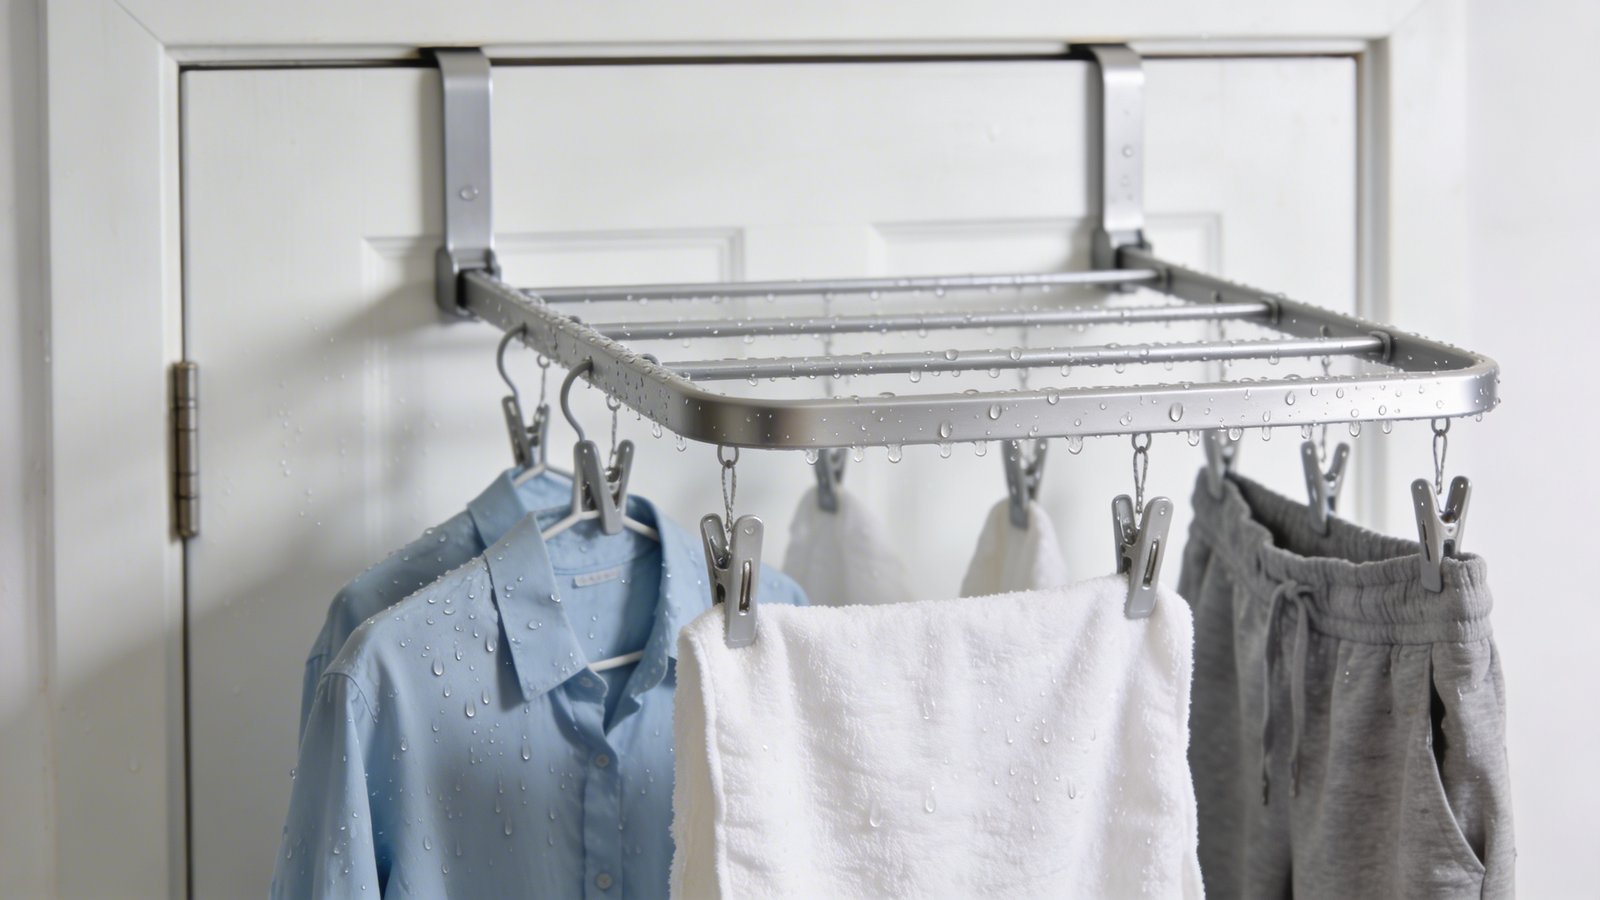
No drill? No problem. Over-door racks hook right over any standard door and provide instant drying space. They’re perfect for renters or commitment-phobes who don’t want permanent fixtures.
The downside is weight capacity. Don’t expect to hang your entire week’s worth of jeans on these bad boys. They work best for delicates, underwear, and lighter garments that need air-drying.
Ceiling-Mounted Pulley Systems
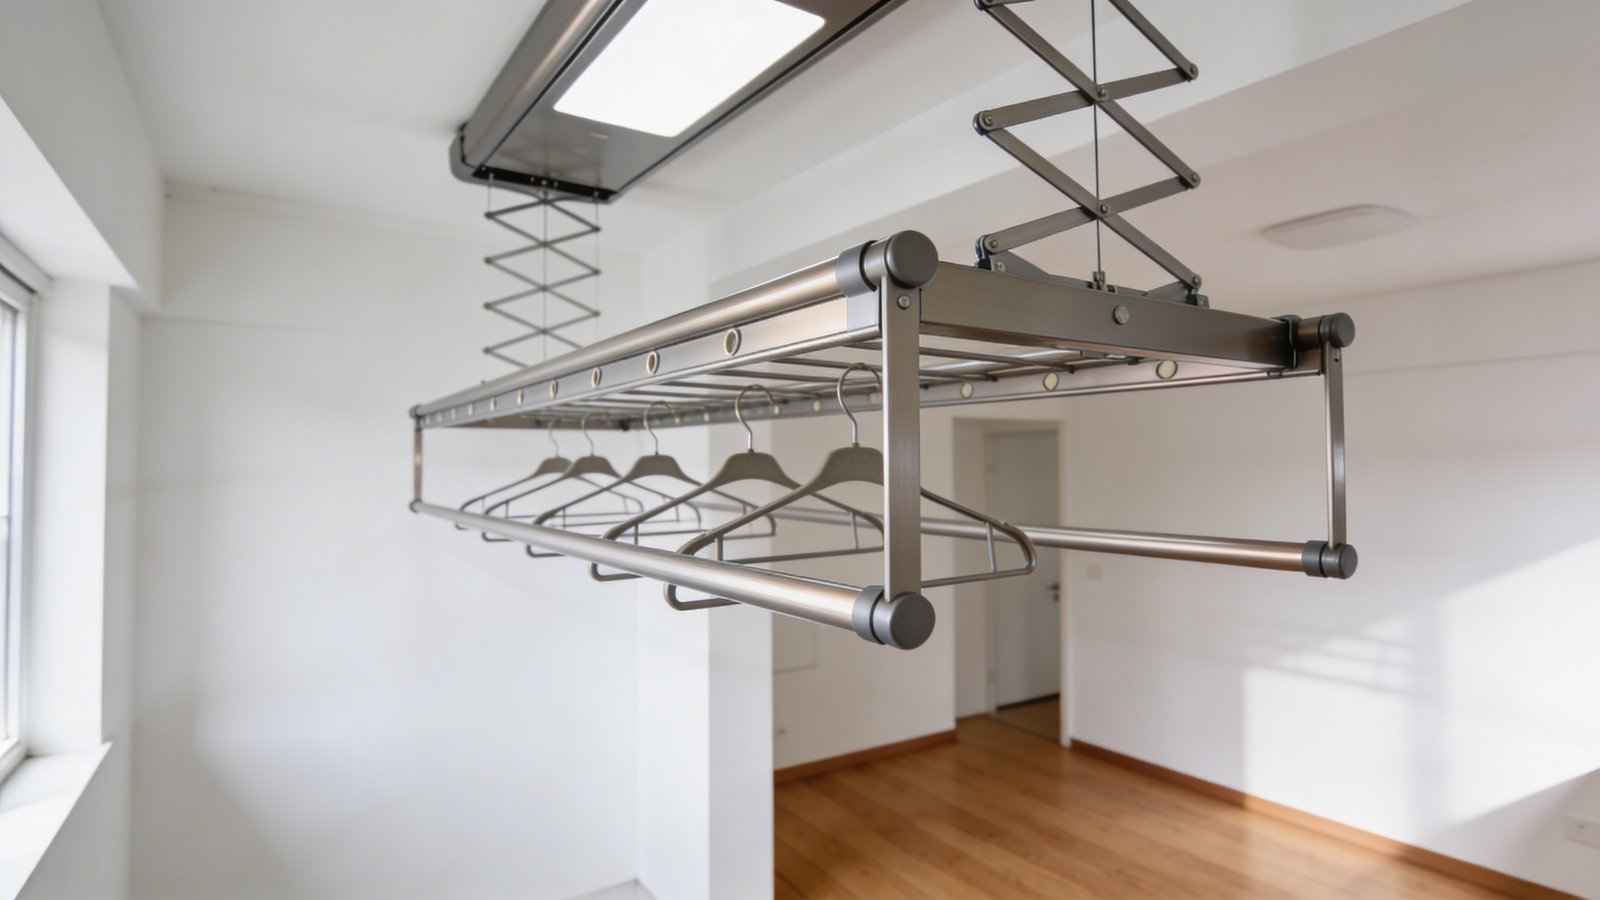
Here’s where we get fancy. Traditional ceiling-mounted drying racks (hello, European laundry rooms!) use a pulley system to raise and lower the rack. You load your clothes at waist height, then hoist the whole thing up to the ceiling where it’s completely out of the way.
This space-saving clothes drying rack setup requires ceiling installation but pays massive dividends in usable floor space. Plus, warm air rises, so your clothes actually dry faster up there.
Compact Accordion-Style Floor Racks
Sometimes you need mobility. Accordion-style racks expand when needed and collapse flat for storage. The key word here is “compact” – skip the massive warehouse-sized versions and look for sleek, narrow designs.
These work brilliantly for people who do laundry in different locations or need to move their setup around frequently. Just make sure you can actually store it somewhere when collapsed. A space-saving clothes drying rack setup isn’t very space-saving if you can’t put it away.
Strategic Placement: Location Is Everything
You’ve got the rack. Now where the heck do you put it? This decision makes or breaks your entire space-saving clothes drying rack setup.
Bathroom Positioning
Bathrooms are drying rack heaven. The humidity from showers actually helps clothes dry more evenly (weird but true), and most bathrooms have unused wall space begging for a purpose.
Mount a retractable rack above your toilet or next to the shower. Position an over-door rack on the back of the bathroom door. The moisture and ventilation create an ideal environment for air-drying clothes.
Bedroom Closet Solutions
Your closet likely has dead space you’re ignoring. Install a wall-mounted rack on the inside of your closet door or along an empty wall. When the closet door closes, your drying clothes disappear from view entirely.
This space-saving clothes drying rack setup keeps wet laundry contained and out of your living areas. Plus, clothes hanging in a closet just look more intentional than clothes draped across a rack in your bedroom.
Balcony or Patio Options
Got outdoor space? Use it! A balcony or patio offers natural airflow and sunlight, which means faster drying and natural freshness.
Just invest in a weather-resistant rack or bring your regular rack outside only when needed. The UV rays from direct sunlight also act as a natural disinfectant and whitener for your clothes. Score.
Maximizing Your Drying Capacity Without Taking Up More Space
The secret to a killer space-saving clothes drying rack setup isn’t just about the rack itself. It’s about wringing every inch of capacity from the space you’ve committed.
Stack your racks vertically when possible. Use tiered designs that create multiple drying levels. Hang shorter items on top bars and longer items on bottom bars to prevent overlap.
Invest in quality hangers for items that need to keep their shape. Hanging dress shirts and blouses on hangers attached to your drying rack prevents wrinkles and uses vertical space more efficiently than draping them flat.
Add S-hooks or shower curtain rings to create additional hanging points. You can clip these onto your existing rack bars and instantly double your capacity for smaller items like socks, underwear, and tank tops.
The Folding Technique That Changes Everything
How you arrange clothes on your rack matters more than you think. Fold jeans and pants over the bar so they hang in a U-shape rather than draping them flat. This creates better airflow and cuts drying time.
Space items out enough for air circulation. Cramming everything together defeats the purpose of air-drying and can actually make clothes smell musty. A proper space-saving clothes drying rack setup prioritizes airflow as much as space efficiency.
Common Mistakes That Waste Space and Time

Let’s talk about what NOT to do, because I see these mistakes constantly.
Stop buying gigantic drying racks that “maximize capacity.” They maximize nothing except your frustration when you can’t walk through your apartment. Bigger isn’t better when you’re working with limited square footage.
Don’t ignore weight limits. Overloading a lightweight rack causes sagging, wobbling, and eventual collapse. Check the manufacturer’s specifications and respect them. A broken rack sprawled across your floor is the opposite of space-saving.
Avoid placing racks in high-traffic areas just because that’s where they fit. That pathway between your couch and TV? Not a drying rack zone. You’ll knock into wet clothes constantly and probably knock the whole thing over eventually.
The Ventilation Mistake Nobody Talks About
Placing your space-saving clothes drying rack setup in a poorly ventilated area guarantees musty-smelling clothes and potential mildew issues. Air needs to circulate, period.
If you must use a windowless room, run a fan nearby or crack a door. Stagnant air + wet clothes = regret. IMO, it’s worth the tiny electric bill increase to run a small fan during drying.
Multi-Rack Systems for Serious Small-Space Dwellers
One rack might not cut it if you’re washing for a family or simply do laundry frequently. The solution? A coordinated multi-rack approach that still saves space.
Combine a primary floor rack with a secondary wall-mounted option. Use the floor rack for heavy items like towels and jeans, then reserve the wall-mounted rack for delicates and lighter pieces.
Add an over-shower-rod rack for bonus capacity. Tension rods designed for shower curtains work perfectly for hanging lightweight items. String one up in your shower or across a hallway when you need overflow space.
The key to a successful multi-rack space-saving clothes drying rack setup is versatility. Each rack should serve a distinct purpose and occupy a different spatial zone – floor, wall, door, or ceiling.
Budget-Friendly DIY Options That Don’t Look Cheap
You don’t need to drop serious cash on fancy European drying systems. Some of the best space-saving solutions cost under $30.
Command hooks rated for heavy weight can hold multiple hangers along any wall. Arrange them strategically, and you’ve got instant drying space that looks intentional rather than desperate.
Tension rods installed in awkward corners or narrow spaces create perfect spots for hanging clothes. Stick one in that weird gap between your washer and wall or across a small alcove.
Wooden dowel rods mounted on simple brackets create a minimalist, stylish drying bar that doubles as decor. Stain or paint the wood to match your space, and nobody will guess it’s a budget DIY project.
FYI, IKEA’s basic drying racks are actually fantastic for small spaces. Their MULIG model is narrow, sturdy, and costs less than a fancy coffee. Sometimes the simple solutions win.
Frequently Asked Questions
How much drying capacity do I actually need for a small apartment?
Most single people or couples need about 15-20 linear feet of drying space per load. That’s roughly equivalent to a standard accordion rack expanded fully. Families should aim for 30-40 feet, which typically requires a multi-rack space-saving clothes drying rack setup. Measure your average load size before buying to avoid getting a rack that’s too small or unnecessarily large.
Can I use a space-saving clothes drying rack setup in a humid climate?
Absolutely, but you’ll need to prioritize ventilation even more. Place your rack near a dehumidifier, fan, or open window. Humid climates require active airflow to prevent that musty smell and mildew growth. Wall-mounted racks in bathrooms work particularly well because you can run the exhaust fan during drying. Just expect slightly longer drying times than in drier climates.
How do I prevent my drying rack from leaving marks on the floor or walls?
For floor racks, use furniture pads under each leg to protect hardwood or tile. Wall-mounted and over-door racks should have protective backing or padding where they contact surfaces. If your rack doesn’t include this, add adhesive felt pads yourself. For ceiling-mounted setups, ensure proper anchoring into studs or use heavy-duty anchors rated for the weight you’ll be hanging.
What’s the actual drying time difference between a dryer and a space-saving rack?
Air-drying typically takes 12-24 hours depending on fabric thickness, humidity, and airflow. Lightweight synthetics might dry in 6-8 hours, while thick towels or jeans can take a full day. You can speed things up by using a fan, positioning the rack near a heat source (not touching!), or spacing items generously for maximum air circulation. The trade-off? Your clothes last longer and your energy bill drops.
Can I combine different types of racks in one space-saving clothes drying rack setup?
Definitely! The best setups often mix rack types strategically. Pair a wall-mounted retractable rack with a small floor rack for overflow. Combine a ceiling-mounted system with an over-door rack for different garment types. Just make sure each rack has its own dedicated space and purpose. Randomly scattering racks everywhere creates chaos, not efficiency.
How do I deal with dripping water from freshly washed clothes?
Always position your space-saving clothes drying rack setup over a water-resistant surface or place a towel underneath. Bathrooms with tile floors are ideal. For carpeted areas, use a waterproof mat designed for washing machines. Better yet, spin clothes thoroughly or hand-wring excess water before hanging. Those first few hours produce the most dripping, so you can move the rack to a less sensitive location once the initial deluge stops.
Conclusion
Creating the perfect space-saving clothes drying rack setup for your small home doesn’t require magic or a degree in spatial engineering. It requires thoughtful planning, the right equipment for your specific space, and strategic positioning that works with your daily routine.
Start by assessing your available space honestly. Choose a rack type (or combination of types) that fits your needs without overwhelming your square footage. Position everything with ventilation and accessibility in mind.
Your laundry routine should make life easier, not turn your home into a humid jungle gym. The right space-saving clothes drying rack setup disappears when not needed and performs flawlessly when called into action. Now get out there and reclaim your living space from the tyranny of wet laundry.

0 Comments